Pages

Friday 27 July 2012

Pattern Pyramid Giveaway - round 3

I am incredibly excited to be hosting my own first-ever giveaway, thanks to winning the second round of the Pyramid Pattern Giveaway at dottiedoodle. It was very exciting to receive this package this morning.


As mentioned in my previous post, this is a chain giveaway so there are rules! One of which is I get to choose my own pattern before passing along the bundle! So I chose..


If you want to win the third round of the Pattern Pyramid Giveaway, your pick out of one of the below and the chance to host your own giveaway just read on..!


1. Anyone, anywhere can enter by leaving a comment on this post by midnight GMT on Wednesday 1 August but you must have an active blog. Sorry this is quite a short draw, I fly off to New Zealand on Friday and so want to get them off and posted. If you have entered, please do check your emails as early as you can on Thursday as if you're a winner I'll need your address ASAP! [If you don't, I'll try to stuff the pack in my luggage and send it from down-under.]

2. I will randomly select one winner, and post them the collection of 4 patterns along with hand woven labels to be sewn into anything made from the picked pattern.

3. The winner will pick one pattern to keep for themselves, then host their own giveaway on their blog. They will randomly select a winner, post the remaining patterns to that Person D. Person D will pick a pattern for themselves, host their own giveaway and post the remaining patterns to the winner... etc!

For more information on this chain giveaway including details of the charity supported by generous pattern donor visit Did you Make that?

Get commenting and good luck!

Friday 20 July 2012

MLM Summer Cocktails

My friends and I wanted to make mojitos for a BBQ we had last week. We brought together our ingredients and instead of having rum we had Martini Bianco, so mojitos were out of the picture. We had limes and mint ready but also a very ripe delicious Indian mango. What came next was magical, the creation of the perfect summer cocktail.

Serves 3/4

1 ripe Indian Mango (the soft kind)
2 cups ice cubes
1 Lime
5/6 mint leaves
3/4 servings of Martini
Water/lemonade

Scoop out the fruit of the lime and the mango. Put everything except the water/lemonade into a blender until the ice has blended. Pour into cups and top up with lemonade or water (I had water). Garnish with a mint leaf and/or a lime wedge.


This picture was what happened when we mixed the ingredients in the blender without the alcohol and mint leaves - still good but mixing them in the blender on the second round was better.

Does anyone else have their own conconctions for summer cocktails? Enjoy!

Thursday 19 July 2012

Skinny Chunky Monkey Cookies

Because I am on a special diet at the moment I can't eat white flour or sugar. I had pinned these cookies from Six Sisters a while ago but my friends coming around for dinner yesterday gave me a perfect excuse to make a batch and try them out. Cookies with no sugar sound bad I know, but these were suprisingly satisfying. They weren't that sweet but just sweet enough if you have a few (and you can! they're healthy!)!

Makes 30 small cookies

3 ripe bananas
2 cups oats
1/4 cup peanut butter (the recipe calls for creamy but I used crunchy)
1/4 cup unsweetened cocoa powder
1/3 cup unsweetened applesauce
1 tsp. vanilla extract


Preheat the oven to 170C/350F. Mash the banana in a bowl then mix in the remaining ingredients.


Leave to stand for minimum 20 minutes and then spoon teaspoonfuls onto a cookie tray covered with baking paper.
 

Bake for 20 minutes. You can freeze them once completely cool in a freezer bag (if you wanted.. I didn't because I wanted to EAT them!). 


The recipe calls for them to be baked for 10-12 minutes only. I took one out after this time and it was very soft in the middle. If you're one of those people that like eating cookie dough and soft cookies (which I'm sure 99% of you are) then 10-12 minutes is fine. I am one of those people that prefers a crunch so I doubled the time. Unfortunately they did not get crunchy but a little more firm and I preferred them that way.

Tuesday 17 July 2012

I won!

I have been avidly following a chain pattern giveaway I stumbled upon on Did you make that? recently. She inherited a bunch of patterns and decided to do a giveaway; The Pattern Pyramid - "a pyramid construction for spreading pattern love around the world". I entered the draws of the people who won from her initial draw and much to my absolute DELIGHT, have just found out I won at dottiedoodle. I've been trying to zoom in on the pictures of the patterns she has up to see what I'm getting. She's also running a Twelve in Twelve giveaway in which one lucky commenter each month wins a pattern so check that out too!

Watch this space for the Pattern Pyramid Giveaway - while you're at it you could add the button and get excited.
 
Didyoumakethat
<div align="center"><a href="http://didyoumakethat.wordpress.com/" title="Didyoumakethat"><img src="http://didyoumakethat.files.wordpress.com/2012/06/pattern-pyramid-small-button.jpg" alt="Didyoumakethat" style="border:none;" /></a></div>
 

Monday 16 July 2012

Tied with a Bow Pouch

As I had a strip of patterned fabric left over from Bailey's skirt I wanted to do something to match the skirt as an extra gift. I looked around mostly on Pinterest but Wendy found a cute little pouch tutorial on Mommy by Day Crafter by Night.

I made it smaller than the tutorial as I didn't see a use for such a long pouch although I did intend to make it a little bigger than it turned out. I still need to learn how to properly sew the ends of a zip! I rarely get it right.


Using Wendy's ultra-cool sewing machine I machine embroided Bailey's initials on the lining of the pouch.
 I would say one thing to change if you are attempting the pouch yourself is to sew the bow into the circular mid section. Otherwise it is quite easy to pull your bow right out of the pouch.

Tuesday 10 July 2012

Elasticated skirt

In June when I was still in the UK and had my sewing machine I decided to get working on a present for Bailey, who was my inspiration for all this creation as well as blogging. As I have mentioned in a previous blog post, she made me such a beautiful quilt for Christmas one year and I can't get over how wonderful it is. It was her 21st this July so I wanted to make her something nice with my improved sewing skills. I had some fabric that suited her perfectly but there wasn't that much. I was toying with the idea  of a bag or purse but she has made them in the past probably better than I could have made. I found this tutorial and really wanted to try it out but I didn't have enough of the fabric I had saved for Bailey. So, I bought some red cotton that coordinated with it and it worked so well.


I followed the instructions mostly apart from the fact I sewed a strip of red cotton onto the end of my patterned fabric - both to make the skirt long enough and to add a little something to it. Even though it is risky making clothes for people with no measurements (otherwise it would have ruined the surprise!) I wasn't too worried as it was a elasticated waist so there was a big leeway - also I could have quite easily shortened the elastic or brought up the hem to fit after I gave it to her. I made a huge mistake at the beginning and started to cut the fabric in half before I realised I didn't want to, so it worked out okay in the end as I could cover the cut bit with the red.


I made another mistake when I wasn't following the instructions properly and made things difficult for myself - sewed up the ends to make the skirt before hemming or putting the elastic in! It wasn't a huge problem with the hemming (just a bit more fiddly) but I had to undo the stitching to get the elastic in, and redo it when I had done it.


As a pointer, once you have the elastic through you can safety pin one end to the other so you can try it on and amend as you like without the risk of you losing the end of elastic. I had to look at pictures of Bailey and I and decided we were about the same size so measured the skirt on myself to fit.


I also hemmed this skirt properly so there isn't an ugly fraying seam under the skirt. I'm learning new things all the time.


I love the way it turned out and she was delighted with the skirt. I'm definitely going to make one for myself! In my next post I'll show you the little matching something I gave her with the skirt.


Monday 9 July 2012

Jack Daniels Cake Tutorial

Bailey's 21st birthday party was an explosion of great Southern American food. Everything was there; baked beans, corn on the cob, pulled pork, coleslaw, potatoes, and my favourite: ribs.


Last year for Bailey's birthday I made the esteemed rainbow cake (which I repeated for Faron's birthday - see here) so I wanted to make a tradition of it and attempt another great cake. Running with the theme of the night I looked up how to make cakes in the shape of ribs, corn, etc., but I didn't think I could quite pull it off (and the thought of eating something that looks like ribs but tastes like cake isn't the greatest thing in the world). Then I found it: Jack Daniels, the Southern American liqor. I also thought it was quite fitting due to it being her 21st; a boozy cake is highly necessary! After a bit of searching around I'd found some great Jack Daniels shaped cakes with no recipe/tutorial, or Jack Daniels recipes with no bottle shape. So here it is.. a Jack Daniels Cake Tutorial.

I wanted this cake to be perfect so Faron and I made a pratice cake and glaze to see how it went. I learnt something - Faron is great at carving cakes into shapes! From that I knew exactly how to modify the recipe and to make the perfect JD bottle shaped cake. I also learnt that even though you make a practice cake you might still mess up the real cake. He was a lot better than me!


I got the recipe from the caked crusader and wow, what a great brilliant incredible recipe. This cake is seriously good, I'm warning you now. The glaze and the cake are magical together. I'll write out the recipe again and make a few modifications I found worked better or translations for UK audiences! As I made the cake into a Jack Daniels Bottle shape you will need a square cake pan not a bundt.

Cake

1 1/2 cups water
1/2 cup + 3 tablespoons Jack Daniel’s Whiskey
1 tablespoon instant coffee powder
1 1/4 cups unsalted butter (pretty much 250g stick with a bit left over for greasing the pan)
1 cup cocoa powder
2 cups sugar
2 eggs
2 cups plain flour
2 teaspoons baking powder

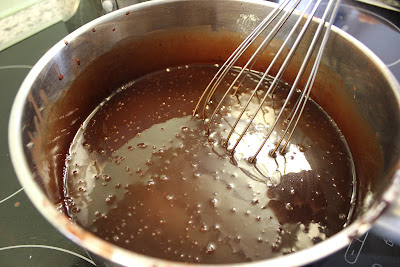
- Preheat oven to 325F/160C. Grease a 9x9 inch square cake pan, make sure to do this well otherwise this happens:


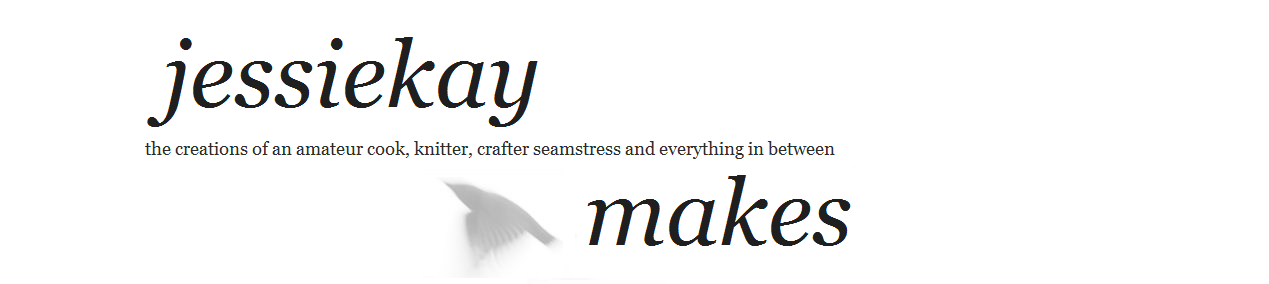
- In a large saucepan heat and stir water, whiskey, coffee powder, butter and cocoa until butter melts.
- Remove from heat and beat in sugar
- Cool slightly and whisk in eggs, blending thoroughly 
- In a bowl stir together flour and baking powder
- Beat into chocolate mixture until incorporated
- Turn batter into cake pan
- Bake for 60-75 minutes, until a knife comes out clean
- Immediately sprinkle warm cake with 2 tablespoons of whiskey
- Let the cake cool completely on a wire rack (If you remove it too early the bottom will be extremely soggy)
- Once cooled, turn onto serving dish and sprinkle the top with remaining 1 tablespoon of whiskey


Shape

Once cooled you can cut your cake into shape. Start by cutting two sides off to form the body of the bottle.


Next cut off about 1/3 of the bottom of the sides you just cut off and cut them both in half lengthways.


This will form your bottle neck in a good rounded shape where the cake rose in the middle while baking.


Next cut off two small bits to form the cap, they can come from wherever  you have left.


I had a bit of a nightmare during cooking as I started having dinner so forgot about the cake for a bit. It didn't burn but it was dryer than the practice cake especially on the outside - yours shouldn't be this crumbly.


Glaze


1 1/2 ounces dark cooking chocolate
1/4 cup unsalted butter
1 cups powdered sugar
3 tablespoons demi-creme/half fat cream/half-and-half
2 tablespoons Jack Daniel’s (depending on if you want to taste the whiskey or not) 
1/2 teaspoon vanilla extract


- Melt chocolate and butter in a double boiler/bain-marie then remove from heat
- Add cream, whiskey and vanilla extract to chocolate mixture
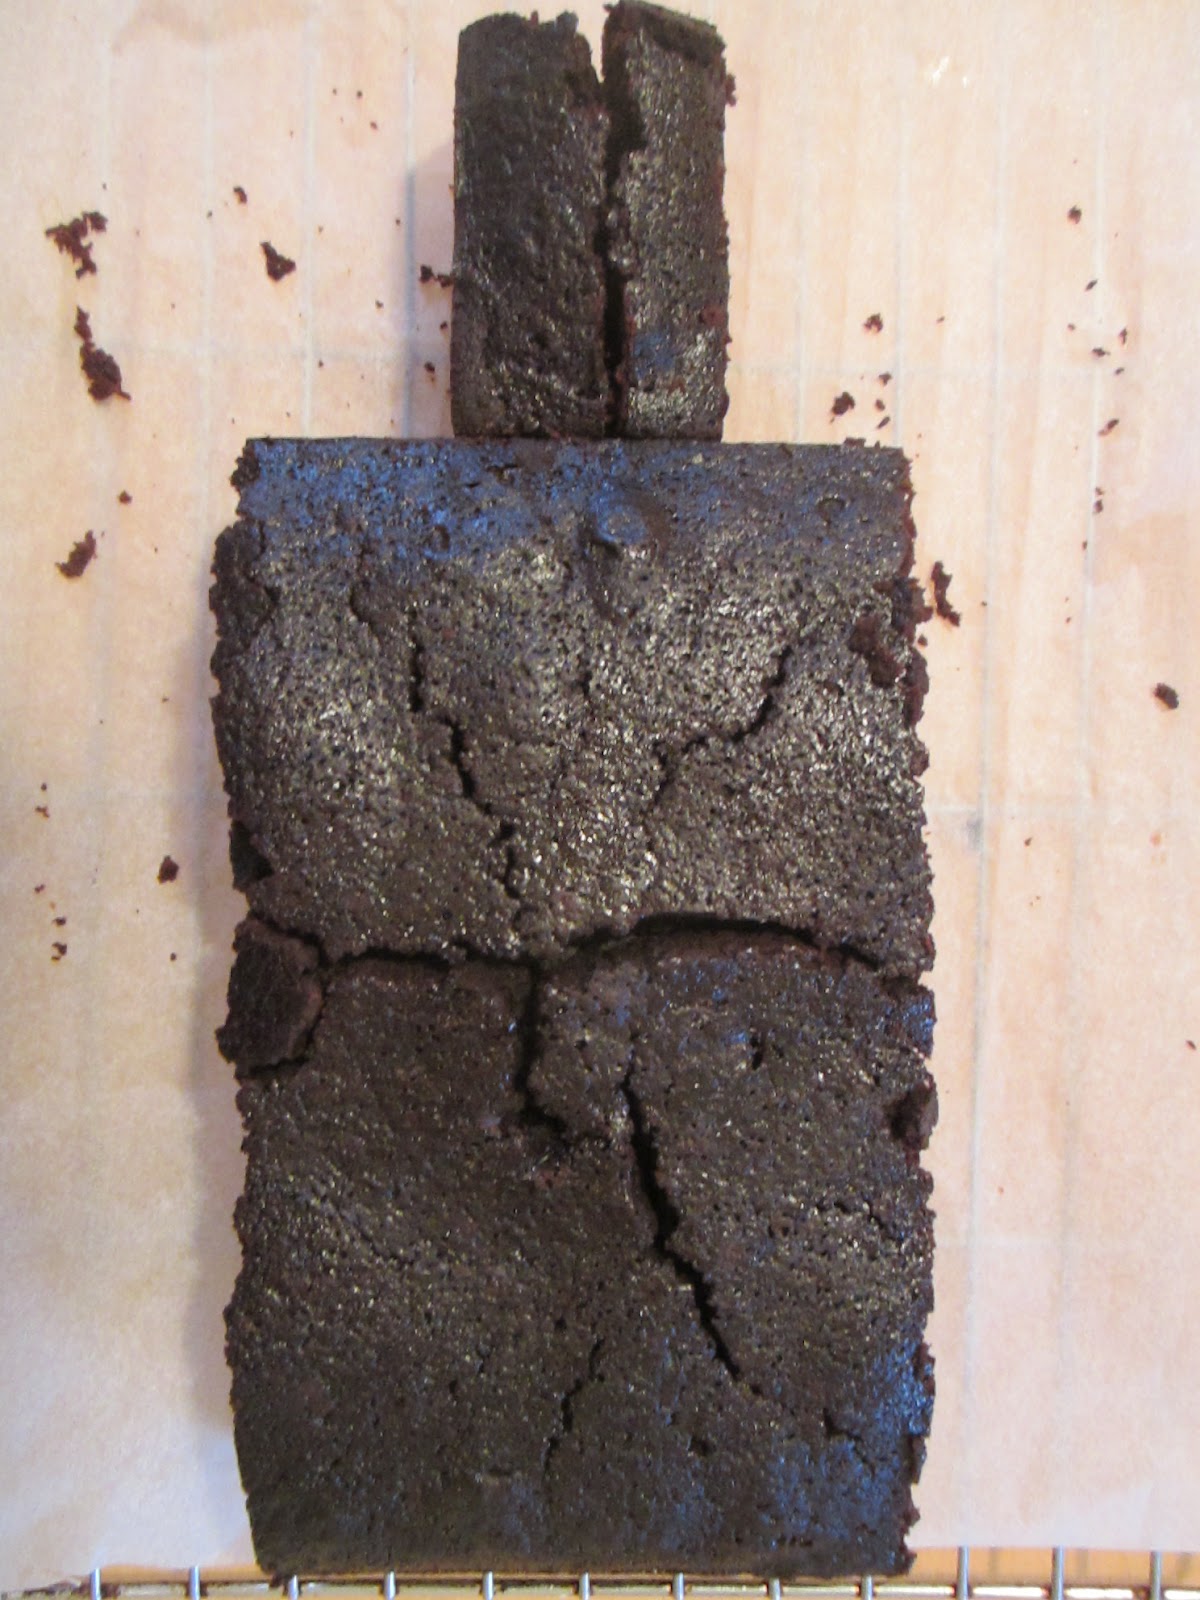
- Add in powdered sugar until you reach your desired consistency (1 cup was perfect for a glaze - I added 1 1/2 cups to the mixture and it was pretty much frosting instead of glaze as I wanted as in the picture
- Let it sit for 30 minutes to thicken and turn into the brilliant amber colour that looks like proper JD
 - Spoon the glaze over the whole cake, going over it a few times


Label

There are various ways of removing a label from a bottle but many of these would not have worked for me as the bottle was not empty. I put the JD in a bowl of water with around 1 tbsp (not specifically measured) of baking soda/bicarbonate soda for about 40 minutes and I could peel it off easy enough. This doesn't help for getting the sticky residue off but I didn't have time to remove it all. You just need the picture anyhow!

Place the label in the appropriate place on the bottle. It should stay easily due to the glaze/frosting.


For the lid I used a cut out square from the label off the back of the bottle.


Stupidly I left my camera at Bailey's house ready for her party so some of the photos were taken with my little camera - apologies for the low quality.